


 English
 Español
 عربى
عربى

Every floor scrubber, whether a compact walk-behind unit or a heavy-duty ride-on machine, relies on a single component to turn a wet cleaning pass into a dry, safe, and presentable floor: the squeegee. Suspended at the rear of the machine, the squeegee gathers the dirty solution left by the brushes and directs it into the vacuum pickup opening, where it is carried to the recovery tank. When the squeegee blade wears out, becomes misaligned, or collects debris, the entire scrubbing process loses value. Water streaks remain on the floor, drying times increase, slip hazards multiply, and operators are forced to repeat the task.
This guide provides a practical framework for floor scrubber squeegee replacement and maintenance. It covers the function of the squeegee assembly, the warning signs of blade wear, a step-by-step replacement workflow, adjustment methods for optimal water pickup, and daily habits that extend blade life. The information applies to the automatic floor scrubbers most commonly used in commercial facilities and industrial plants, with an emphasis on procedures that an in-house maintenance team can perform without specialized tools.
A squeegee in poor condition does more than ruin the visual result. Every liter of water left on the floor represents a slip hazard, extends drying time, and slows the workflow in food production, retail, and logistics environments. Treating the squeegee as a precision component pays measurable dividends in safety and productivity.
The Role of the Squeegee in Floor Scrubber Performance
The cleaning sequence on an automatic scrubber is simple in concept. Rotating brushes or pads loosen dirt from the floor surface while a detergent solution carries the suspended solids. Immediately behind the brushes, the squeegee assembly creates a confined channel along the floor. The front blade spreads the water evenly, and the rear blade wipes the remaining film into the channel. A vacuum fan draws the liquid through a pickup hose into the recovery tank, leaving the floor nearly dry.
The design intent of the rear blade is especially important. It contacts the floor along its entire width and maintains a seal that prevents water from escaping behind the machine. If the rear blade has a worn section, a nick, or an improper contact angle, that portion of the seal fails and water leaks past. The result shows up immediately as a wet trail, a pattern of streaks, or a film of water that takes several minutes to evaporate.
Front Blade versus Rear Blade
- The front blade encounters the dirty solution first and centers it toward the vacuum opening.
- The rear blade acts as a wiper that holds the water inside the channel until it is extracted.
- Both blades must maintain equal pressure across the floor for an airtight seal.
- The rear blade typically experiences faster wear because it scrapes a thin water film under constant contact.
- Some squeegee assemblies allow the front and rear blades to be interchanged or reversed, extending the usable life of both.
Squeegee assemblies come in a few configurations. Bolt-on blades are secured with screws or clips along the channel. Quick-change systems use a lever or spring-loaded pivot that releases the blade in seconds, a valuable feature on large ride-on machines. Regardless of the fastening method, the geometry remains the same: two parallel blades, a pickup opening between them, and a secure vacuum connection at the top.
Operators should review the complete range of floor scrubber machines offered by the manufacturer before selecting a replacement blade, because blade dimensions, hardness, and mounting patterns differ between walk-behind and ride-on platforms.
Recognizing When a Squeegee Blade Needs Replacement
Squeegee blades are consumable items. The rate of wear depends on the abrasiveness of the floor, the frequency of operation, the chemicals used in the cleaning solution, and the weight applied to the squeegee frame. A polyurethane blade in an office environment can serve for hundreds of operating hours, while the same blade in a concrete factory or a warehouse with heavy grit may need replacement every few weeks. Rather than relying on a fixed schedule, operators should learn to recognize the physical and behavioral signals of a failing blade.
Physical Signs on the Blade
- Cracks or nicks across the contact edge that catch on expansion joints and floor seams.
- A curled or rolled edge that lifts away from the floor under normal downforce.
- A glazed, shiny surface that indicates hardening of the polyurethane material.
- One side of the blade visibly shorter than the other due to uneven height adjustment.
- Permanent compression marks from storage with the squeegee left lowered overnight.
Behavioral Signs During Operation
- Evenly spaced water streaks across the full width of the cleaned path.
- A single wet line that always appears in the same location, usually the center.
- A constantly wet floor behind the machine even though the vacuum motor is running.
- Audible hissing from air drawn through a broken seal between the blade and the floor.
- Water spraying sideways from the ends of the squeegee while turning.
Before ordering a replacement, inspect the mounting channel and the area around the pickup opening. Loose fasteners, bent frames, or trapped debris can create symptoms identical to a worn blade.
Step-by-Step Squeegee Blade Replacement Guide
Replacing a squeegee blade is one of the simplest maintenance procedures on a floor scrubber and, when done correctly, restores water recovery performance immediately. The following steps apply to most walk-behind and ride-on models. Always consult the instruction manual for torque values, fastener types, and blade orientation requirements specific to the machine.
A common mistake is replacing only one blade. Because the front and rear blades wear at different rates, mixing a fresh blade with a half-worn one changes the water flow and often produces streaks. Replace both blades at the same time whenever possible.
Tools and Materials
- New squeegee blades matched to the holder width and mounting hole spacing.
- A flat-head screwdriver or a small wrench for loosening retaining hardware.
- A clean rag, mild detergent, and a soft brush for cleaning the assembly.
- Safety gloves to protect against sharp edges on the old blade.
Replacement Procedure
- Park the machine on level ground, lower the squeegee, and cut all power to the drive system and vacuum motor.
- Release the retaining clips, thumb knobs, or screws that hold the front and rear blades in the holder channel.
- Extract both worn blades and set them aside for recycling or disposal.
- Clean the channel, the mounting pins, and the pickup opening using the brush and a damp cloth. Remove every particle of dried detergent and grit.
- Insert the new front blade first, aligning the mounting holes with the pins, and tighten the fasteners from the center outward so the blade lies flat without buckling.
- Insert the new rear blade using the same procedure, then confirm that both blade edges rest against the floor across the full width of the squeegee.
- Adjust the blade height and angle, and run the machine over a wet section of floor to verify that no water remains behind the squeegee.
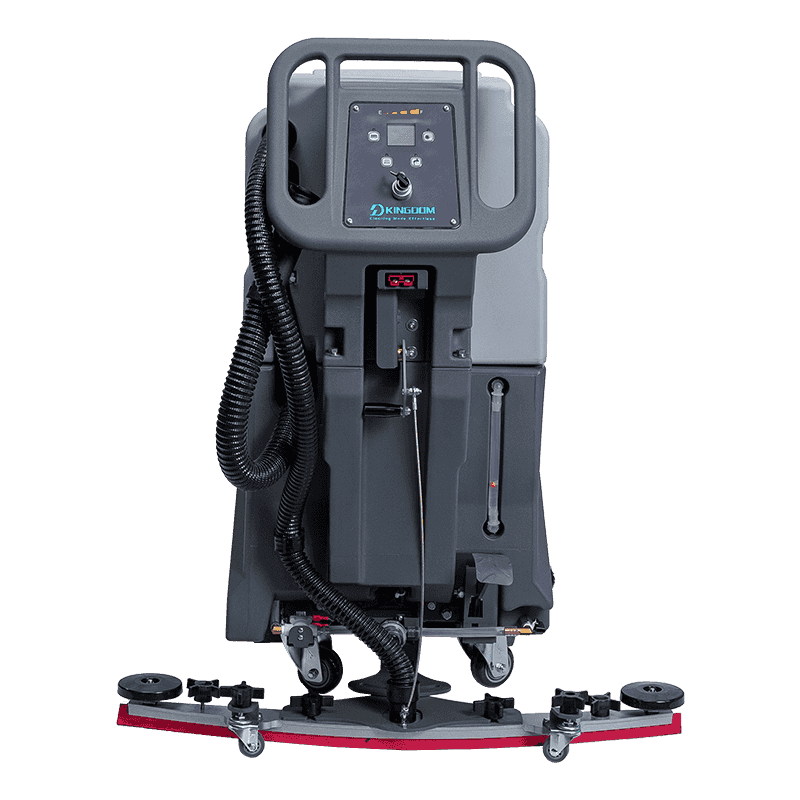 JD55 Walk-behind Industrial Auto Floor Scrubber MachineThis walk-behind scrubber features a patented water absorption assembly designed for easy replacement and adjustable brush plate pressure, making it relevant for achieving proper squeegee adjustment and optimal floor drying.View Product →
Squeegee Adjustment for Optimal Water Recovery
Even a brand-new blade produces poor results if the squeegee assembly is not adjusted correctly. The goal of adjustment is to achieve light, even contact between the full length of both blades and the floor, with the rear blade deflected slightly as the machine moves forward. Most assemblies provide adjustment points at the two ends where the frame attaches to the lift mechanism.
Height and Leveling
- Lower the squeegee so the entire blade length touches the floor without an obvious gap on either side.
- Turn the end knobs in small increments until the blade is parallel to the floor and the downforce is equal from left to right.
- Aim for the lightest contact pressure that produces a dry floor; excessive force accelerates blade wear and increases machine drag.
Angle and Tension
- Allow the blade to deflect backward approximately one quarter of an inch at the center when the machine moves forward.
- Keep the squeegee frame free of binding so it can pivot and follow the floor contour during turns.
- Verify that the lift spring provides enough tension to hold the assembly in the down position without letting it bounce on rough surfaces.
Testing the Adjustment
Run the scrubber straight ahead over a wet area for at least three meters, then examine the strip of floor left behind. A dry, uniform surface with no water lines confirms the setting. If a wet pattern appears, stop the machine and repeat the leveling procedure. Re-test the machine after every blade change, and after any impact that could bend the frame or shift the mounting brackets.
Squeegee behavior changes with direction. Moving forward, the flexed rear blade creates the seal. In reverse, the front blade is dragged and water pickup loses efficiency. Prolonged reverse operation with the squeegee lowered increases front blade wear and distorts the contact pattern, so limit reverse travel by planning the cleaning path.
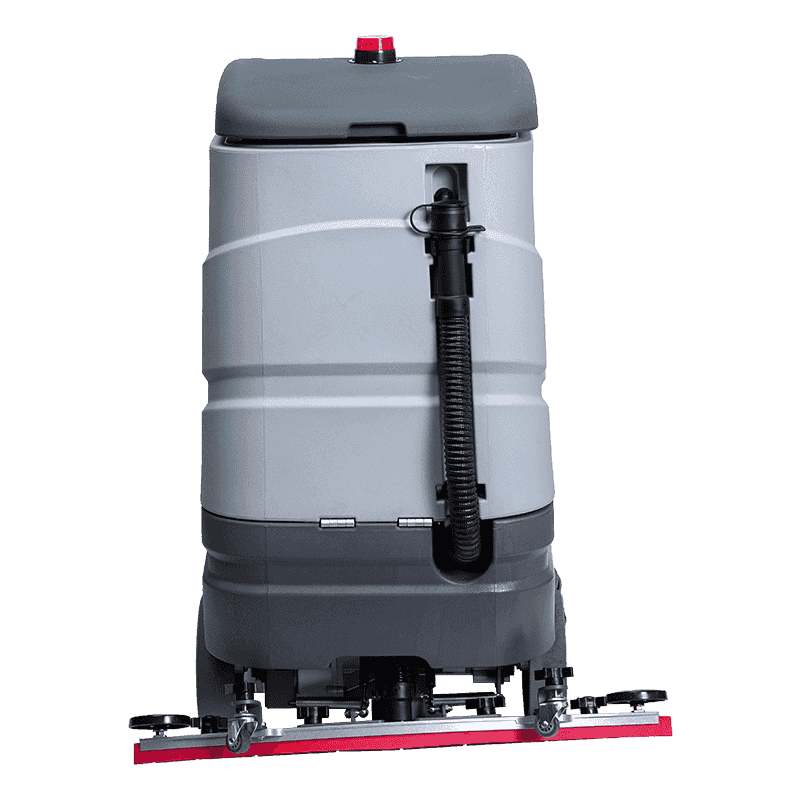 JD75 Ride-on Industrial Automatic Floor ScrubberThis ride-on scrubber offers variable speed regulation and a patented water absorption assembly, supporting efficient cleaning and maintenance practices that extend squeegee life and prevent blockages.View Product →
Daily and Weekly Maintenance Routines
Prevention is cheaper than correction. The most valuable maintenance habit is rinsing the squeegee blades and the suction channel immediately after the last cleaning pass. Chemical residues that dry on the blade edge cause hardening, and sediment trapped inside the channel reduces airflow. Two minutes of cleaning at the end of each shift can extend blade life by a significant margin and keeps the recovery system free of blockages.
| Frequency | Task | Purpose |
|---|---|---|
| Daily | Rinse blades with clean water | Remove detergent and chemical residue |
| Daily | Inspect blade edges for nicks or curling | Catch wear before streaking appears |
| Daily | Flush the suction channel and opening | Prevent airflow loss and debris buildup |
| Daily | Empty and rinse the recovery tank | Reduce odors and bacterial growth |
| Weekly | Check retaining hardware tightness | Maintain even blade contact pressure |
| Weekly | Flip or rotate blades if design allows | Equalize wear on both contact edges |
| Monthly | Measure blade width against service limit | Plan replacements before performance drops |
| Monthly | Lubricate squeegee pivot points | Ensure smooth lowering and turning |
Keep a record of the installation date and operating hours for each blade set. A simple board near the charging station helps the maintenance team identify a blade nearing the end of its service life before the floor starts to streak. This habit is cheap, requires no software, and reduces re-cleaning time.
Facilities that monitor blade usage tend to replace blades at the optimal moment rather than after streaking has already slowed the crew. Read more about how modern floor scrubbers are improving cleaning efficiency across industries to understand why squeegee care belongs at the center of a wider maintenance strategy.
Troubleshooting Common Squeegee Issues
When a scrubber leaves water behind, operators often blame the vacuum motor or the recovery tank float. In most cases, the cause is far simpler and sits at the squeegee assembly. The table below lists the most frequent failure patterns and the actions that resolve them.
Most squeegee faults escalate quickly. A small nick that creates a single streak can widen into a full-width wet band within one or two shifts because the escaping water carries grit that abrades the adjacent material.
| Symptom | Likely Cause | Corrective Action |
|---|---|---|
| Single wet line in the center | Worn center portion of the blade | Rotate or replace the blade |
| Wet line along one outer edge | Uneven downforce between the two ends | Level the squeegee height |
| Entire floor remains wet | Rear blade not touching the floor | Lower the rear blade contact |
| Regular streaks across the path | Nicks or embedded debris on the edge | Clean and, if needed, replace the blade |
| Hissing sound while running | Vacuum hose dislodged or damaged | Reconnect or replace the hose |
| Water escapes during turns | Squeegee pivot or lift bracket binding | Lubricate pivot and inspect spring tension |
| Fine mist behind the machine | Rear blade angle too steep | Reduce the deflection angle |
Flipping versus Replacing
Flip a blade when the active edge has worn to roughly half of its usable width, provided the design allows it. Once both sides have been used, or if the material shows cracking, hardening, or permanent deformation, install a new blade. Replacement is also required when the blade has lost its memory and no longer returns to a straight line after being bent.
Extending Blade Life Through Proper Storage
How a squeegee is stored between shifts affects how long the blade will serve. Polyurethane blades are sensitive to ozone, ultraviolet light, and prolonged deformation under pressure. Taking a few precautions protects the material and prevents premature failure.
- Always store the machine with the squeegee raised so the blades are not compressed against the floor under the full weight of the assembly.
- Keep the scrubber away from direct sunlight, ozone-generating motors, and battery charging stations when idle.
- Clean the blades before overnight parking; dried chemicals act as an abrasive film that damages the edge on the next pass.
- If the machine will be idle for more than a week, loosen the blade clamps to remove constant pressure and prevent compression set.
- Store spare blades flat in a cool, dark location, and inspect stored blades periodically for ozone cracking.
Maintaining a small spare-parts inventory for each machine in the fleet is a practical step. Replacement blades are compact and inexpensive compared with the cost of machine downtime. Spare blades for the machine types in your fleet cost a fraction of the labor required to re-clean a large facility after a failed drying pass.
Floor Scrubber Squeegee Maintenance FAQ
Q1: How often should floor scrubber squeegee blades be replaced?
There is no single interval that fits every facility. In a typical commercial environment, a polyurethane blade should be flipped every 150 to 300 operating hours and fully replaced once both edges show wear. In more abrasive industrial settings, the interval may be much shorter. Weekly visual inspections provide the most reliable signal.
Q2: Can squeegee blades be flipped and reused?
Yes, when both edges of the blade are identical and the manufacturer permits rotation. Flip the blade when the first edge has lost about half of its usable width. Mark the installation date and the active edge with a marker so maintenance staff can track the status of every blade in the fleet.
Q3: Why does my floor scrubber leave a single wet line in the middle?
A wet line in the center is usually caused by the middle section of the blade wearing faster than the edges, because the water flow concentrates there. It can also be produced by a small piece of debris trapped between the blade and the holder. Inspect the edge, clean the channel, and flip or replace the blade if the wear is visible.
Q4: Should the squeegee blade lie completely flat on the floor?
No. The blade should contact the floor along its full length with light and even pressure, but the assembly operating angle makes the rear blade deflect slightly during travel. Excessive downforce or a perfectly flat orientation accelerates wear and can block the natural flow of water into the pickup channel.
Q5: How can I reduce the frequency of blade replacements?
Rinse the blades after every shift, keep the channel free of debris, store the machine with the squeegee raised, and set the contact pressure as light as possible while still achieving a dry floor. Use cleaning chemicals recommended for the blade material and avoid high-alkaline detergents that dry out polyurethane.
Q6: Why is the whole floor still wet after the scrubber passes?
This most often points to one of three issues: the rear blade is not touching the floor over its full length, the vacuum hose is blocked or disconnected, or the recovery tank float valve has shut off the airflow. Check the rear blade leveling first because it is the most frequent cause, then inspect the vacuum circuit.
